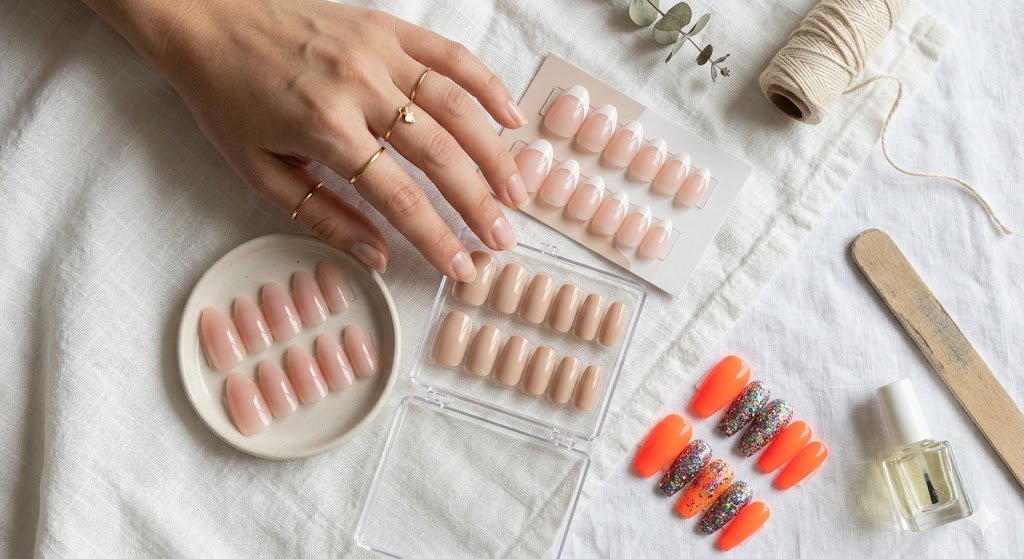
Press-on nails have come a long way from the thick, obviously fake sets people used to avoid. These days, some of the best designs are nearly impossible to tell apart from a professional salon manicure. Still, one question keeps coming up: how to make press on nails look real. If you’ve ever applied a set only to notice bulky edges, visible glue, or a shape that feels slightly off, you’re definitely not alone. The difference between a natural-looking manicure and one that screams “press-ons” often comes down to a few small details that most people overlook.
The good news? You don’t need expensive products or advanced nail skills to get a convincing result. Choosing the right size, preparing your natural nails properly, refining the shape, and knowing a few insider tricks can completely change how your manicure looks and wears. In this guide, you’ll learn 11 practical tips that help create natural looking press on nails, avoid common mistakes, and keep your set looking polished for days instead of hours.
Why Some Press-On Nails Look Fake in the First Place
Before diving into the tips, it helps to understand why some press-ons look salon-quality while others immediately give themselves away. The issue isn’t usually the nails themselvesnit’s the application, sizing, and finishing details.
- Sizing errors: Choosing nails that overlap the skin or sit too wide creates a bulky look.
- Thickness: Heavy plastic near the cuticle creates an abrupt, unnatural ridge.
- Poor preparation: Leftover oils and moisture cause gaps, lifting, and uneven adhesion.
- Unrealistic shapes: Extreme lengths or styles can look disconnected from your natural hand proportions.
Here’s a quick breakdown of the most common causes of unrealistic-looking press-ons:
| Problem | Why It Looks Fake |
| Incorrect sizing | Creates gaps, overhang, and bulky edges |
| Thick cuticle area | Produces a raised, artificial appearance |
| Visible glue | Draws attention to the attachment point |
| Poor nail prep | Causes lifting and uneven adhesion |
| Unnatural shape or length | Looks disconnected from the natural nail |
| Skipping filing and blending | Leaves harsh edges that stand out |
The good news is that every one of these problems can be fixed. In fact, most of the tips that follow focus on correcting these exact issues. Once you learn how to apply press on nails correctly and refine the finishing details, even budget-friendly sets can look surprisingly realistic.
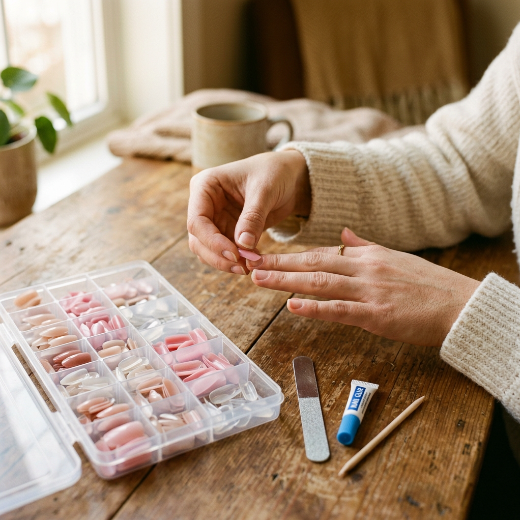
Choose the Right Nail Size for Every Finger
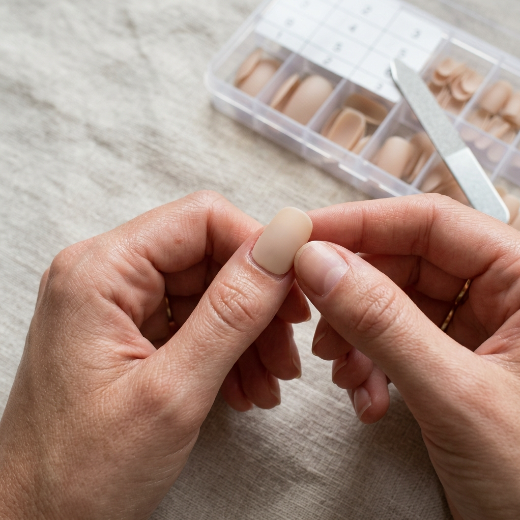
If there’s one thing that can make or break a press-on manicure, it’s choosing the right size. Even the prettiest set can look fake if the nails are too wide, too narrow, or don’t match your natural nail shape. Many people pick larger sizes to avoid gaps, but oversized press-ons often overlap the skin and create a bulky appearance. Instead, choose nails that fit comfortably from sidewall to sidewall. If you’re between sizes, select the larger one and gently file the edges for a custom fit. Taking a few minutes to size each nail properly can make the entire manicure look far more natural.
To find the right fit, check these areas before application:
- The press-on should cover the nail from side to side without touching skin.
- There should be no visible gaps near the sidewalls.
- The cuticle area should follow the curve of your natural nail.
- The nail should sit flat without rocking back and forth.
- Each finger may require a different size, even if they appear similar.
When sizing is done correctly, the press-ons blend much more naturally with your nail bed and instantly look more like a professional manicure.
Prep Your Natural Nails Like a Nail Technician
A flawless press-on manicure starts long before the nails are applied. Even high-quality press-ons can look uneven or lift quickly if they’re placed on oily, dirty, or unprepared nails. That’s why proper nail prep is one of the most important steps in the process. Start by removing old polish and residue, then gently push back your cuticles and lightly buff the nail surface to remove shine. Finish by cleaning your nails with rubbing alcohol to eliminate oils and moisture. These simple steps help the press-ons sit flatter, look more natural, and stay secure for longer.
Here’s a simple prep checklist to follow:
| Nail Prep Step | Why It Matters |
| Remove old polish | Creates a clean surface for adhesion |
| Push back cuticles | Helps the press-on sit closer to the nail bed |
| Lightly buff nails | Improves grip and reduces lifting |
| Clean with alcohol | Removes oils and residue |
| Ensure nails are dry | Prevents moisture-related lifting |
Many people looking for ways to make press-on nails last longer focus on stronger glue, but proper preparation often makes a bigger difference. A clean nail surface creates a stronger bond and helps achieve a more seamless, salon-quality finish.
Pick Press-On Nails With a Thin Cuticle Edge

The thickness of a press-on nail near the cuticle can make a huge difference in how realistic it looks. Natural nails have a smooth transition from the nail bed, so press-ons with thick bases often appear bulky and easier to spot. For the most natural result, look for sets with a thin, tapered cuticle edge that blends seamlessly into your nail bed. Many high-quality brands advertise features like “natural contour” or “ultra-thin cuticle area,” which are worth paying attention to.
Here are a few signs of a more natural-looking press-on set:
- Thin, flexible cuticle area
- Slightly tapered edges
- Natural curve that follows the nail bed
- Lightweight feel instead of thick plastic
- Multiple sizing options for a customized fit
| Thin Cuticle Edge | Thick Cuticle Edge |
| Blends naturally into the nail bed | Creates a raised appearance |
| Looks closer to a salon manicure | Can appear bulky from the side |
| Less noticeable in photos | Easier to spot up close |
| More comfortable to wear | May feel heavier on the nail |
If you’ve already bought a thicker set, lightly filing the underside of the cuticle area can help reduce bulk. A thin layer of clear top coat over the seam can also make the transition look smoother and more natural.
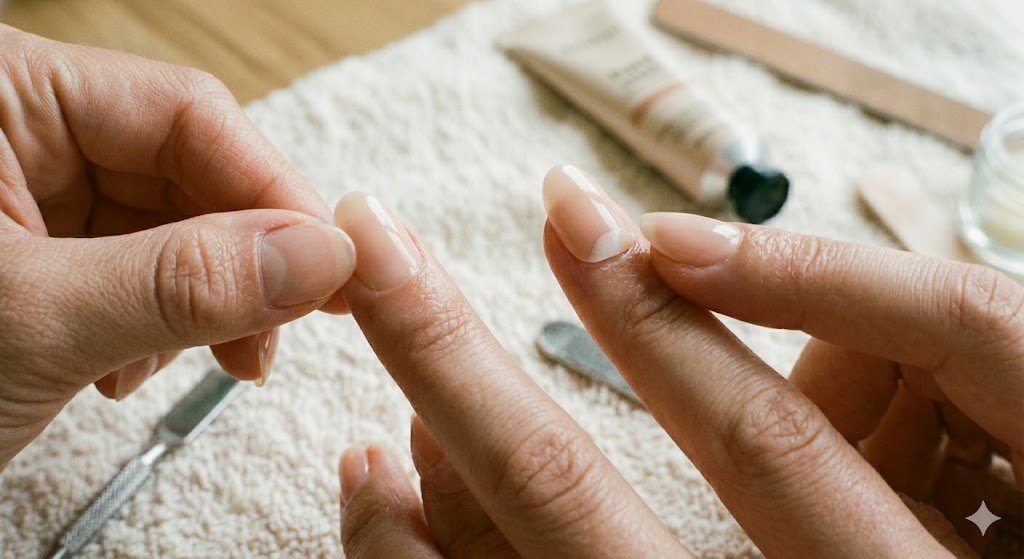
Shape and File the Nails for a Custom Fit
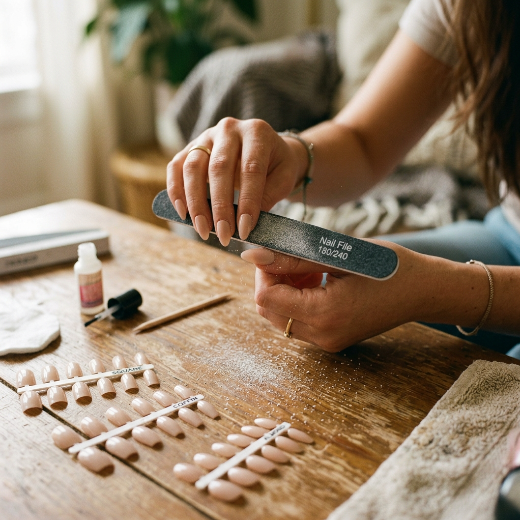
Most press-on nails come in standard shapes that won’t perfectly suit every hand. Taking a few minutes to file and customize them can make a dramatic difference in how realistic they look. Even small adjustments to the length, sidewalls, or tips can help the nails match your natural proportions and appear more professionally done.
When shaping your nails, focus on these areas:
- Length that suits your lifestyle and hand shape
- Side edges that align with your natural nail bed
- Smooth corners without harsh angles
- Consistent shape across all ten nails
- Balanced proportions between thumb, index, and pinky nails
| Nail Shape | Realism Level | Best For |
| Almond | Very Natural | Most hand shapes |
| Squoval | Very Natural | Everyday wear |
| Soft Square | Natural | Professional looks |
| Oval | Natural | Short to medium lengths |
| Coffin | Moderate | Fashion-forward styles |
| Stiletto | Less Natural | Statement manicures |
Medium-length almond, squoval, and soft square nails typically look the most natural. A few strokes with a fine-grit file can also soften thick tips and remove the mass-produced appearance that many press-ons have right out of the package.
Apply the Right Amount of Nail Glue
Using the correct amount of glue is essential for both appearance and wear time. Too much glue can spill around the edges and create a messy finish, while too little can leave air pockets that cause lifting. The goal is to create a thin, even layer that allows the press-on to sit flat against the natural nail.
For the most natural result:
- Avoid letting glue touch the surrounding skin.
- Apply enough adhesive to cover the nail plate evenly.
- Press from the cuticle area toward the tip to remove trapped air.
- Wipe away any excess glue immediately.
- Allow the adhesive to fully set before using your hands heavily.
| Glue Issue | What Happens |
| Too much glue | Overflow, visible residue, bulky appearance |
| Too little glue | Air pockets, lifting, weak hold |
| Uneven application | Crooked fit and inconsistent adhesion |
| Proper amount | Smooth finish and stronger bond |
A simple trick is to place a small amount of glue on both the natural nail and the press-on before application. Then press firmly for 20 to 30 seconds. When done correctly, the nail looks cleaner, feels more secure, and blends much more naturally with your nail bed.
Blend the Cuticle Area for a Seamless Finish
Even when everything else is done right sizing, prep, glue there’s still one spot that can instantly expose press-ons: the cuticle line.
A visible ridge or tiny gap near the base of the nail breaks the illusion fast and makes the manicure look less natural.
The fix is simple. After application, check your nails from different angles and look for any harsh line where the press-on meets your natural nail. If you spot it, a few finishing touches can soften the look.
A thin layer of clear top coat over the seam helps smooth the transition. It won’t hide major mistakes, but it does blur small imperfections. Pair that with proper cuticle care, and the difference is noticeable.
Dry cuticles make everything look more artificial, while hydrated skin helps the nails blend in naturally.
For the best results:
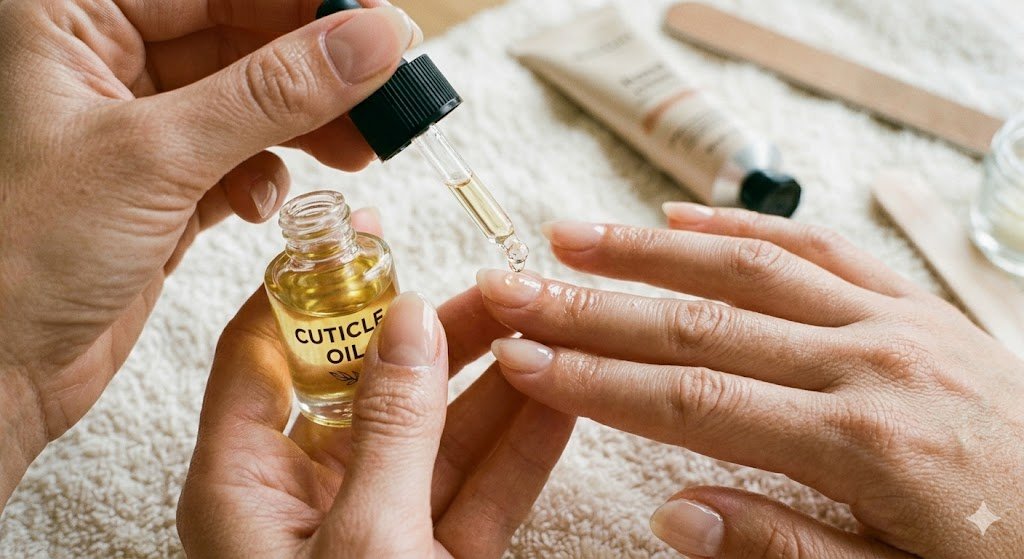
- Apply cuticle oil after the adhesive has fully cured.
- Massage oil into the nail folds and surrounding skin.
- Use a clear top coat to soften visible seams.
- Check nails under natural daylight for accuracy.
- Clean any leftover glue around the cuticle area.
| Cuticle Finish | Final Look |
| Dry cuticles | Nails look unfinished |
| Visible seam | Press-ons are easier to spot |
| Smooth seam with top coat | More natural transition |
| Hydrated cuticles | Salon-level appearance |
| Seamless blending | Most realistic result |
This small step often separates average-looking press-ons from ones that look professionally done.
Choose Natural Colors and Nail Designs
If you want press-on nails that look real, start with shades that complement your skin tone and resemble natural nail colors. Sheer pinks, milky whites, and nude tones are always safe choices, while timeless French tip nail designs remain one of the most realistic and salon-inspired options for everyday wear.
Why color matters more than you think
Natural nails have subtle depth and softness. Solid neon shades, very thick glitter, or overly plastic-looking finishes can make press-ons stand out immediately. In contrast, sheer pinks, milky whites, nude tones, soft reds, and classic French tips tend to mimic the look of professionally done natural nails much better.
The most realistic color choices
If you want to press on nails that look real, start with shades that complement your skin tone and resemble natural nail colors. Soft nude shades also pair beautifully with minimalist nails, which are known for their clean and natural-looking appearance.
- Sheer pink: Creates a healthy, natural nail look.
- Milky white: Soft and clean without looking harsh.
- Nude beige or peach: Blends beautifully with the hands.
- Soft mauve or dusty rose: Elegant and believable for everyday wear.
- Classic French tip: Timeless and salon-inspired when the tips are thin and subtle.
Designs that tend to look less natural
These styles aren’t “bad” they just draw more attention to the fact that you’re wearing press-ons:
- Extra-thick glitter nails.
- Oversized rhinestones or charms.
- Very long coffin or stiletto shapes.
- Bright neon colors with glossy plastic finishes.
- Heavy 3D nail art on every finger.
A quick comparison
| More Natural-Looking | Less Natural-Looking |
| Sheer pink almond nails | Neon green extra-long stilettos |
| Soft French manicure | Thick glitter coffin nails |
| Nude squoval nails | Oversized rhinestone designs |
| Milky white medium-length nails | Ultra-long matte black stilettos |
The finish matters too
A glossy top coat usually looks the most realistic because natural nails have a slight natural shine. Extremely matte finishes can sometimes make press-ons look more like plastic. If your set arrives looking dull or overly shiny in an artificial way, applying your own high-quality top coat can improve the appearance immediately.
Keep the nail art balanced
If you love nail art, you don’t have to avoid it completely. The trick is balance. A subtle accent nail, delicate swirls, micro-French tips, or minimalist designs can still look sophisticated and believable. The more crowded and dimensional the design becomes, the less natural the overall manicure tends to appear.
Match the style to your lifestyle
Another underrated tip: choose designs that make sense for your everyday life. Short to medium-length nude or French nails look believable because they’re practical for work, typing, and daily tasks. Extremely dramatic nails can look stunning online, but they may feel less convincing in casual, everyday settings.
The bottom line
When people search for natural looking press on nails, they’re usually looking for that polished “your nails but better” effect. Soft colors, balanced shapes, subtle designs, and a clean glossy finish are the fastest way to achieve it.
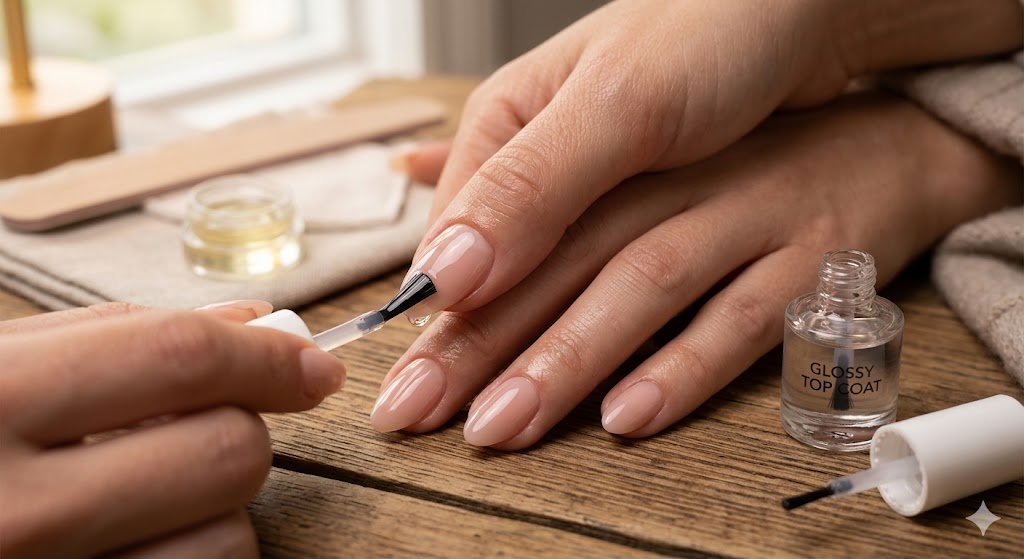
Add a Glossy Top Coat for a Salon Finish
One of the easiest ways to upgrade a press-on manicure is also one of the most overlooked. While many press-on sets come pre-finished, that factory coating can look plastic, uneven, or scratched from shipping. Applying a fresh top coat helps recreate the polished appearance you’d expect from a professional home manicure and makes the nails look more realistic.
Beyond appearance, a top coat acts as a shield, instantly disguising minor application imperfections, subtle filing marks, and tiny gaps near the cuticle.
Benefits of applying a top coat include:
- Creates a more realistic, salon-quality shine.
- Helps conceal minor imperfections and filing scratches.
- Protects printed nail designs from fading.
- Adds an extra layer of durability against chipping.
- Makes the entire set look cohesive and professionally finished.
Not all top coats produce the same result, though. For maximum realism, a high-gloss finish works best because natural nails carry a subtle, reflective quality that a matte surface lacks.
| Top Coat Type | Appearance |
| High-gloss gel-like finish | Most salon-like, premium look |
| Standard clear top coat | Natural, clean everyday shine |
| Matte top coat | Trendy, but less realistic |
| Ridge-filling top coat | Helps smooth out visible seams |
Application is simple. Once your nail glue has fully cured, apply a thin, even layer over the entire nail, making sure to seal the free edge (the very tip) to lock the edges in place. This step is especially crucial if you have filed or reshaped the nails, as filing can dull the plastic edges. A quick layer of top coat restores instant consistency, making budget-friendly sets look expensive without requiring any special skills.
Keep Your Cuticles Moisturized Daily
You can have the perfect nail shape, flawless application, and a beautiful color, but if the skin around your nails is dry and cracked, the entire manicure can look unfinished.
This is one of those details people rarely think about until they compare their nails to a professional salon manicure. Nail technicians don’t just focus on the nails themselves they pay attention to the surrounding skin as well. Healthy, hydrated cuticles help create a polished appearance that makes press-ons blend naturally with your hands.
Dry cuticles tend to draw attention to the edges of the press-on. Tiny flakes of skin, rough patches, and visible dryness can make the transition between the natural nail and the press-on much more noticeable. Moisturized cuticles soften that transition and make the manicure appear more natural overall.
The best part? This tip takes less than a minute a day.
Applying cuticle oil every evening can dramatically improve how your nails look throughout the week. Oils help condition the skin around the nail, while hand creams lock in moisture and prevent dryness from returning too quickly.
For healthier-looking cuticles:
- Apply cuticle oil daily.
- Massage the oil into the nail folds and surrounding skin.
- Use hand cream after washing your hands.
- Wear gloves when cleaning or using harsh chemicals.
- Avoid picking at dry skin around the nails.
Here’s what proper cuticle care can do for your manicure:
| Cuticle Condition | Overall Nail Appearance |
| Dry and cracked | Less polished and less realistic |
| Slightly dehydrated | Nails look unfinished |
| Well-moisturized | Cleaner and more professional |
| Consistently maintained | Most natural-looking result |
Avoid Air Bubbles and Lifting During Application
Nothing makes a press-on manicure look fake faster than visible lifting. Even a tiny gap near the cuticle or sidewall can catch the light and reveal that the nail isn’t naturally attached. Air bubbles create a similar problem, making the nail look uneven and less secure.
The frustrating part? Most lifting starts during application, not days later.
When a press-on is applied too quickly or positioned incorrectly, small pockets of air can become trapped underneath. These pockets weaken the adhesive bond and create areas where the nail doesn’t sit flush against the natural nail plate.
A better approach is to apply each nail slowly and deliberately.
Start by aligning the press-on close to the cuticle without touching the skin. Once it’s positioned correctly, lower it gradually toward the tip of the nail while applying steady pressure. This technique helps push out trapped air and creates a stronger, more even bond.
To reduce the risk of bubbles and lifting:
- Apply nails one finger at a time.
- Position the nail carefully before pressing down.
- Press from the cuticle area toward the free edge.
- Hold firm pressure for at least 20–30 seconds.
- Avoid touching water immediately after application.
- Double-check the sidewalls for gaps.
Many people make the mistake of pressing straight down from above. While this seems logical, it can trap air beneath the center of the nail. Rolling the nail forward from the cuticle toward the tip usually produces a smoother result.
Here’s how different application methods affect the final look:
| Application Method | Result |
| Rushed placement | Increased risk of bubbles |
| Uneven pressure | Potential lifting at edges |
| Excess movement after placement | Weakens the adhesive bond |
| Slow, controlled application | Smooth, realistic finish |
| Firm pressure for 20–30 seconds | Stronger adhesion and better appearance |
Maintain Your Press-Ons Properly to Keep Them Looking Real
Getting your press-ons to look realistic is only half the battle. Keeping them looking fresh for the next week or two is where proper maintenance comes in.
A lot of press-on manicures start out looking great but gradually lose their polished appearance because of small daily habits. Chipped edges, dull surfaces, loose corners, and dried-out cuticles can make even a well-applied set look worn long before it’s time for removal.
The good news is that maintaining press-ons doesn’t require much effort. A few simple habits can help preserve both the appearance and durability of your manicure.
One of the easiest ways to protect your nails is to treat them like a professional manicure rather than a tool. Avoid using your nails to open cans, scrape labels, peel stickers, or pry objects apart. These activities place stress directly on the adhesive bond and increase the chances of lifting.
For long-lasting results:
- Wear gloves while cleaning.
- Avoid prolonged exposure to hot water.
- Reapply cuticle oil daily.
- Add a fresh layer of top coat every few days.
- Be gentle when typing, opening packages, or doing household chores.
- Fix minor lifting immediately before it worsens.
A quick touch-up can often save an entire manicure. If you notice a corner beginning to lift, applying a small amount of nail glue right away can prevent dirt, moisture, and oils from getting underneath the nail.
Addressing lifting early can preserve the integrity of your entire manicure. If you detect a corner starting to detach, immediately apply a small drop of nail glue to seal it; this prevents debris, moisture, and oils from compromising the bond underneath the nail.
The table below summarizes how daily routines influence the longevity of your set:
| Routine Habit | Effect on Longevity |
| Regular cuticle oil use | Preserves a professional, salon-fresh look |
| Utilizing cleaning gloves | Safeguards the finish and adhesive |
| High water exposure | Likely to decrease total wear time |
| Treating nails as tools | Results in more frequent breakage and lifting |
FAQs
How can I make press-on nails look more natural?
The biggest factors are proper sizing, nail prep, and blending the cuticle area. Choose nails that fit your nail beds correctly, file them for a custom shape, and finish with cuticle oil and a glossy top coat. These small adjustments can press on nails that look real instead of bulky or artificial.
What is the most natural-looking press-on nail shape?
Almond, oval, squoval, and soft square shapes tend to look the most natural. They closely resemble the shape of professionally manicured natural nails and work well for everyday wear.
How do you apply press-on nails correctly?
Start by cleaning and buffing your natural nails, then remove any oils with rubbing alcohol. Apply a thin, even layer of glue, position the nail near the cuticle, and press it down from the base toward the tip. Hold it firmly for 20 to 30 seconds to prevent air bubbles and lifting.
Why do my press-on nails look bulky?
Press-ons usually look bulky because they’re too large for the nail bed, have a thick cuticle edge, or weren’t blended properly after application. Choosing the correct size and filing the edges can dramatically improve the overall appearance.
How long do press-on nails last?
Most press-ons last anywhere from 5 to 14 days, depending on the quality of the adhesive, nail preparation, and daily maintenance. Proper prep, careful application, and avoiding excessive water exposure can help make press on nails last longer.
Can you file and reshape press-on nails?
Yes. In fact, lightly filing and reshaping press-ons is one of the best ways to make fake nails look natural. Customizing the length and shape helps them better match your hands and creates a more salon-like finish.
Final Thoughts
The truth is, realistic-looking press-ons aren’t about buying the most expensive set on the market. They’re about the little details. Choosing the right size, prepping your nails properly, blending the cuticle area, and taking a few extra minutes to customize the shape can completely If you’re exploring new styles, browsing different press-on nails can help you find designs that look even more natural and suit your personal style.
Most of those issues are surprisingly easy to fix once you know what to look for. A few simple adjustments can turn an average set into a manicure that looks polished, natural, and professionally done.
Now that you know how to make press on nails look real, try a few of these tips the next time you apply a set. You may be surprised by how much more natural your nails look and how often people assume they’re your real nails. Have a favorite press-on trick of your own? Share it in the comments and help other nail lovers get even better results.